Metamask is a software cryptocurrency wallet that helps users manage Ethereum and Ethereum-based cryptocurrency. It is available as a browser extension as well as a mobile application. It is regarded as one of the most secure and popular crypto wallets.
Metamask supports many popular tokens by default but newer or less popular tokens may not be immediately available. Fortunately, any ERC-20 or ERC-721 compatible token can be added relatively easily to Metamask in a few easy steps.
Note: Metamask has a separate NFT section where ERC-721 tokens are viewable
Checking the Search List
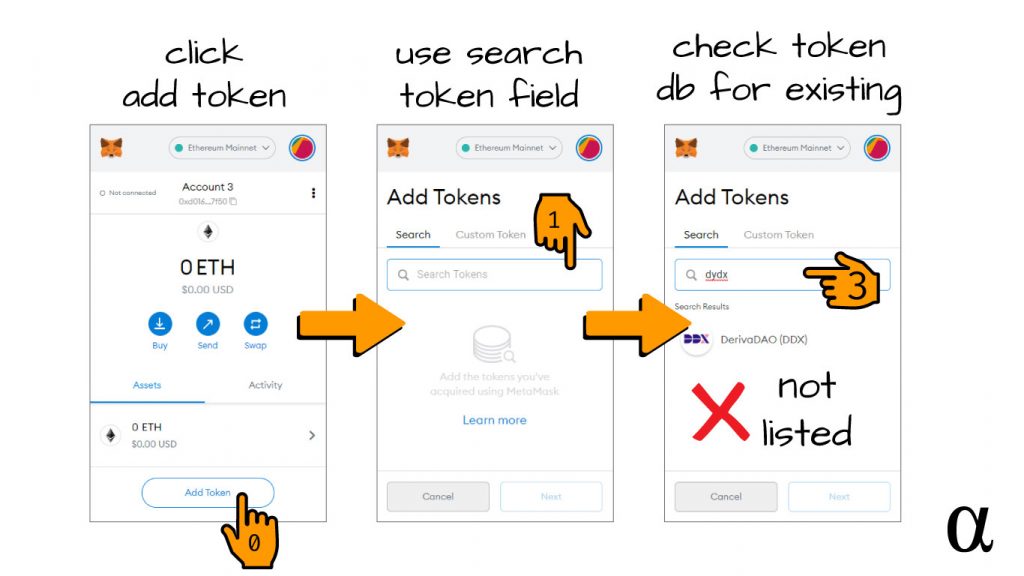
Metamask comes with a long list of tokens that can be added with a simple click. Use the Metamask coin search feature to check whether the token you wish to add support for has already been defined by Metamask. This is done in three simple steps:
- Click the “Add Token” button on the desired Metamask account menu;
- Click within the search field and begin typing the name of the token;
- Scroll down the list to check for a match.
These tokens represent any number of Ethereum-based records of which there are currently more than 450K at the time of writing. As you can imagine, Metamask doesn’t populate the search list with all possible tokens.
Adding an Existing Token to Metamask
If your token is listed in the default search list—adding support in Metamask is as simple as clicking the token result, clicking the add token button, and then confirming in your account view. After this process, you should then see the token (with your related balance) in the main account view of Metamask. The image below illustrates the process for adding the $AAVE token to an account in Metamask:
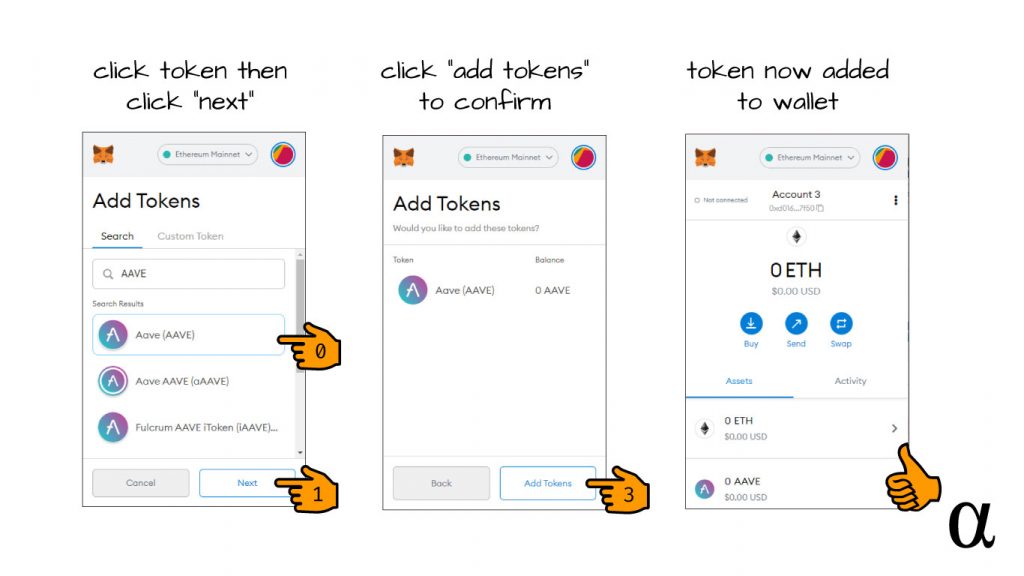
In this case, adding a token was as simple as clicking a few buttons. The process for adding a token that isn’t listed on Metamask is a bit different—but still straightforward.
Adding a Custom Token to Metamask
There are a growing number of cases where an ERC-20 token or ERC-721 token (NFT) will not automagically appear in the Metamask wallet. In such cases, users are required to add tokens by reference to the token’s contract address.
Services like Etherscan and Coingecko make finding these contract addresses simple enough, but one should always reference the official website of the token to ensure correctness. Let’s walk through adding a custom token using the following steps:
- Search Metamask to confirm a custom token add is required;
- Lookup the token contract address on Etherscan;
- Confirm the address is the officially recognized contract address;
- Add the token address and precision value to Metamask
Step 1: Search Metamask
Step 2: Search Etherscan for Token Profile
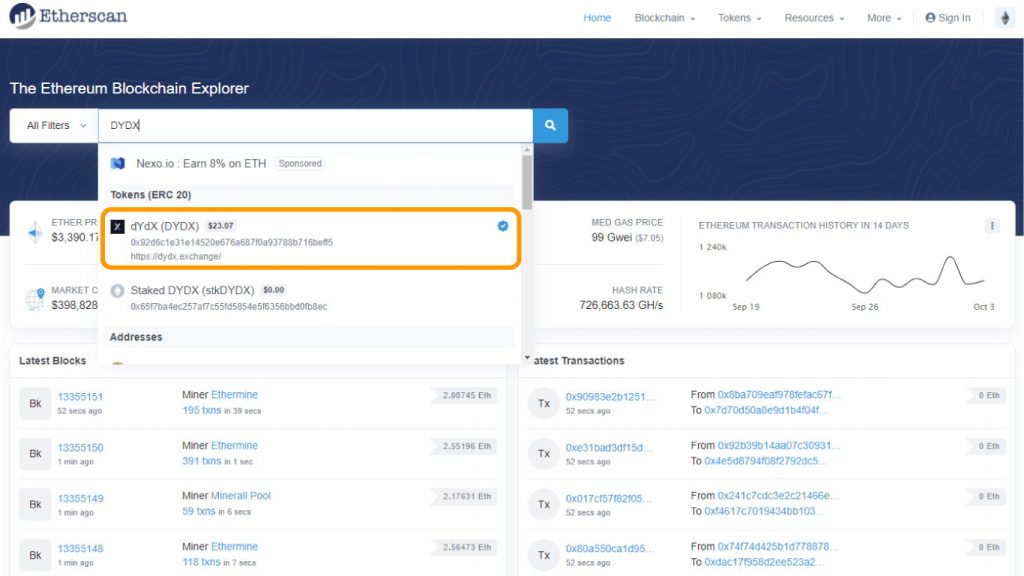
Visit the etherscan.io website and type in the token symbol (DYDX in this case) into the search field on the homepage. You may see your result from the dropdown—you can click that result. Otherwise, hit ENTER or click the search icon to bring up the token information page.
Step 3: Get Token Contract Address from Profile
Etherscan provides lots of useful information related to tokens via profile pages. Here you can find official token websites, social profiles, recent on-chain transactions, and more. More notable coins will have a blue verification checkmark indicating the official nature of the profile page. We’re after the token contract address, shown in the image below:
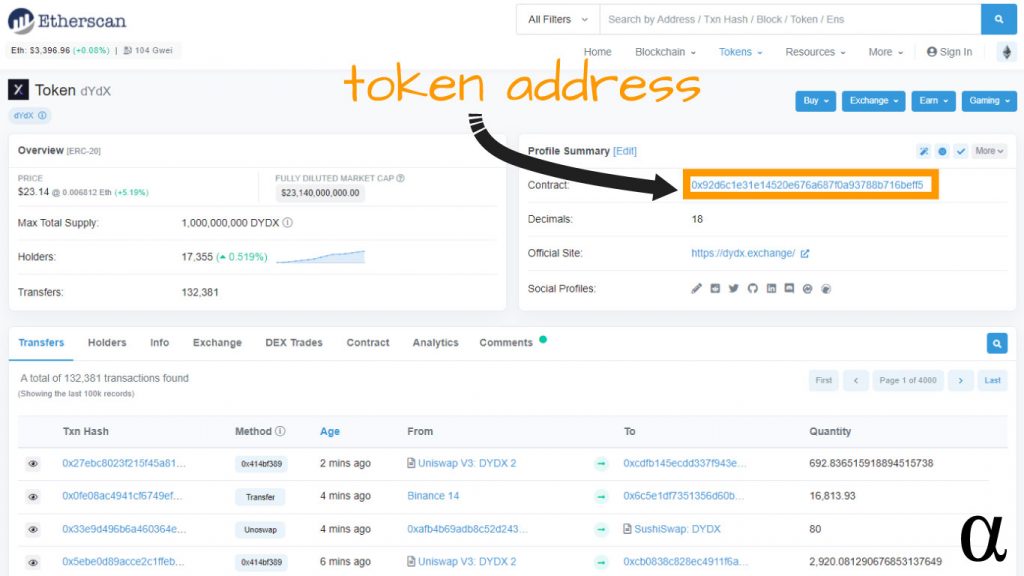
Click the copy/paste icon next to the token address (shown on mouse-hover) to copy the value to your system’s clipboard. This will allow easy entry into the Metamask account.
Step 4: Add Token Contract Address to Metamask
Using the contract address from Step 3, we can now add the token to our Metamask account. The steps for this process are outlined in the image below:
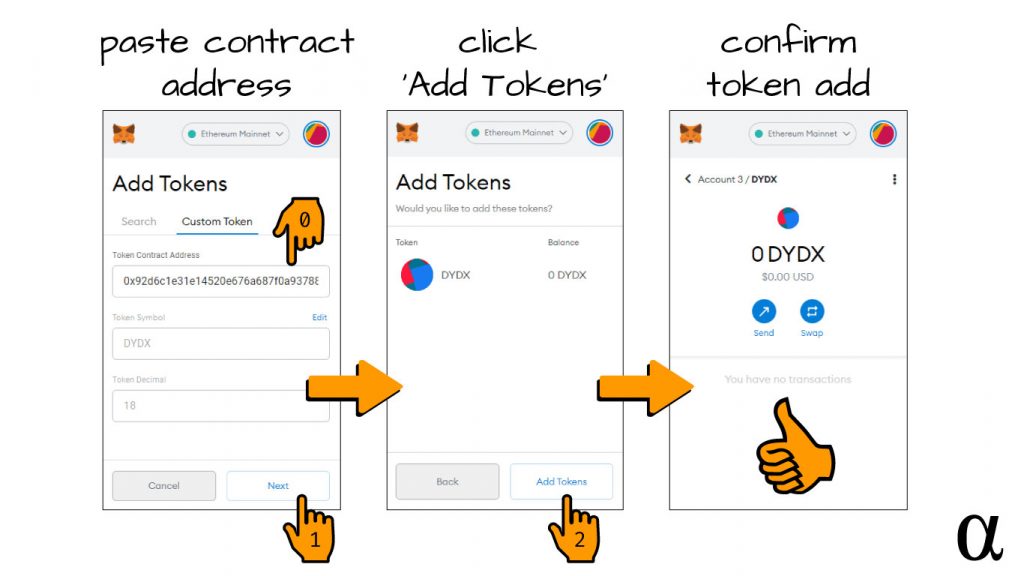
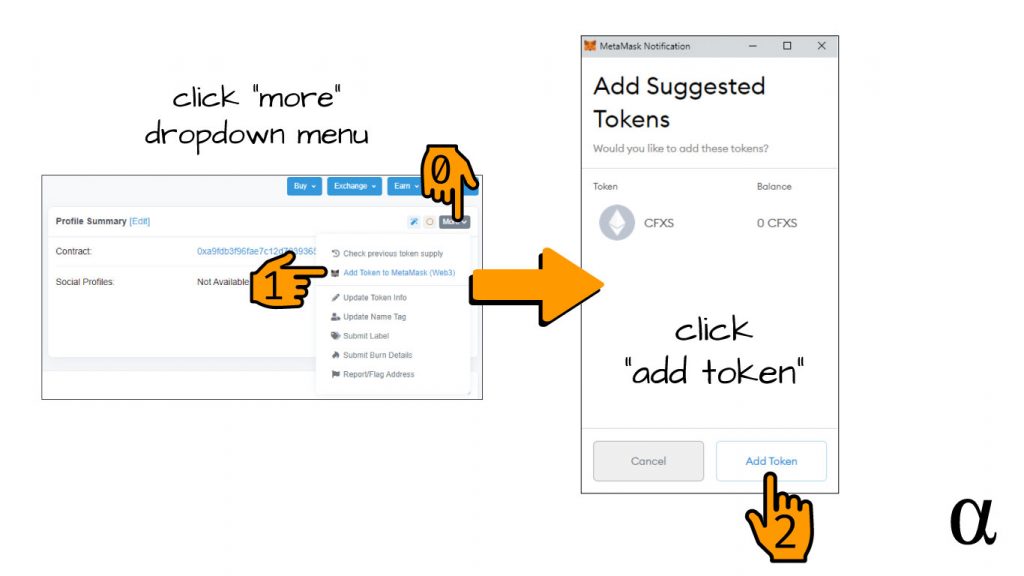
At this point, our Metamask wallet is set up to send and receive the new custom token! As if this process wasn’t seamless enough, etherscan makes things even easier with their custom Metamask integration. By clicking the more dropdown menu, you can automatically add the custom token to your Metamask as shown in the image below:
Final Thoughts
Metamask is a great software wallet and one of the most popular and secure on the market. Creating accounts on Metamask is super easy—but keep in mind that accounts cannot be deleted.
Having dozens of accounts can making keeping track of your tokens burdensome. On the other hand, having multiple accounts can help maximize exposure during airdrop events where tokens are often distributed by address—not by user.
By contrast, Metamask allows users to “hide” tokens should they add several and later decided they’d prefer not to have their wallet cluttered. Typically, the hide option is used for tokens with a zero balance.


