Typescript is a powerful language that provides javascript developers a means to add static typing, enums, interfaces, and other features of common software development languages like C# or Java.
Webstorm is Jetbrains’ dedicated web-language IDE geared to specifically support languages like HTML, CSS, SASS/SCSS, and Javascript. Webstorm offers native support for Typescript but a little added configuration goes far.
In this article, we’ll walk through the steps to configure a basic TypeScript project in Webstorm that will transpile to a single JavaScript file suitable for browser-based applications.
Quick Intro: Typescript 101
The cliché way of introducing TypeScript is “as a superset of JavaScript” which isn’t really descriptive as to why one would want to use it. It can also be described as sensibility for JavaScript in that it allows developers to use common software constructs within an otherwise casual language. Enums, Static typing, and disabling implicit type coercions are a few of the features TypeScript offers.
Back to the “Superset of JavaScript” description — while cliché, it’s important to understand. This characteristic means that all JavaScript code is valid TypeScript code — at least syntactically. There are, however, many cases where the TypeScript compiler may be unhappy. TypeScript also compiles to run anywhere JavaScript will run. We’ll glaze past the rest of the history for now and get to configuring TypeScript with Webstorm.
Assumptions
This article makes several assumptions about programming environments, available software, and pre-existing familiarity. These are as follows:
- Node.js is installed (see here)
- npm is installed (see here)
- Webstorm is installed (see here)
- An empty node.js project (
$ npm init) - A working internet connection (????)
Regarding assumption #2, npm is the package manager for Node.js and is now a part of the standard Node.js installation. If Node.js is installed, npm install/version can be confirmed by running npm -version. The latest version can always be obtained via npm install npm@latest -g in the console. The -g flag — meaning “global” instructs the install to update the global Node.js npm version vs. a local environment.
Step 1: Install ts-node
Webstorm comes with native TypeScript support but we’ll be taking things a step further. Here we will install the ts-node package via npm which provides a range of functionality for TypeScript projects in a local environment. At this point we have a bare-bones Node.js project, with a package.json file as follows:
{
  "name": "typescript-ws-config",
  "version": "1.0.0",
  "description": "Just configuring typescript with Webstorm",
  "main": "index.js",
  "author": "Zack West <alphazwest@gmail.com>",
  "license": "MIT"
}
Install ts-node with the following command: npm install ts-node --save-dev. This can be done via the native OS terminal or via the integrated terminal window in the Webstorm IDE as shown below:
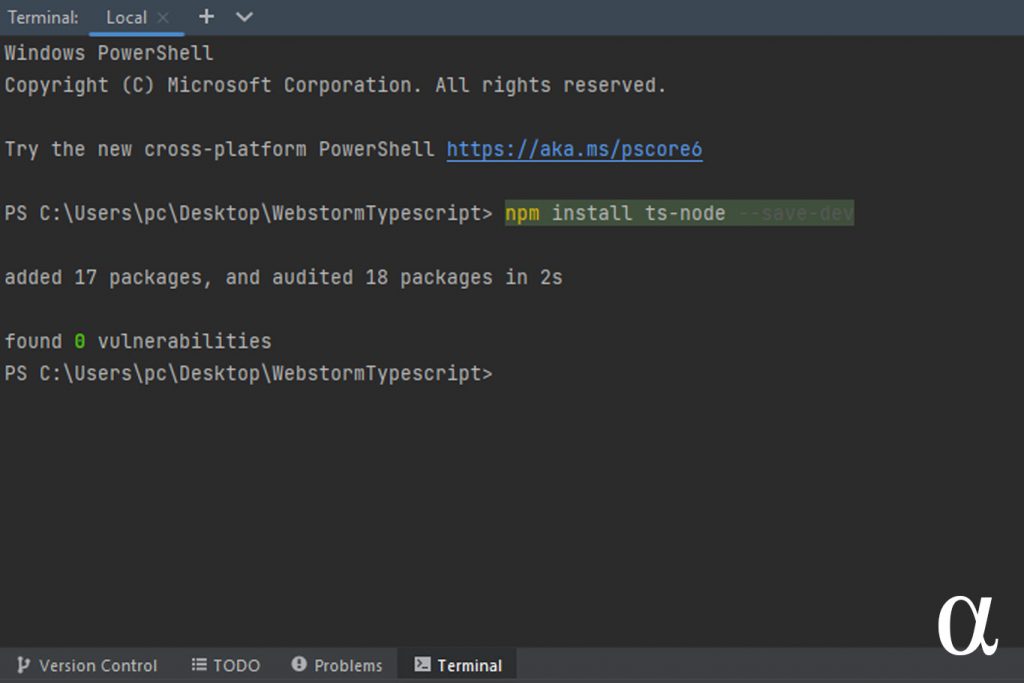
The --save-dev flag adds ts-node as a dependency within the devDependencies section in our package.json file. This indicates that ts-node should not be installed when the production flag is passed with the install command such as: npm ts-node --production. This allows those using a package only for its end-use to avoid unnecessary dependencies. As a rule: if the application can run without the dependency then it should be a development dependency.
Step 2: Create a tsconfig.json file.
Webstorm has native TypeScript support that is enabled when a tsconfig.json file is created — indicating the project root of a TypeScript project. This will signal to Webstorm the presence of a TypeScript project and auto-configure a TypeScript compiler (transpiler.)
Creating the tsconfig.json file can be done manually or via Webstorm by right-clicking on the project directory icon, and selecting new > tsconfig.json file. This approach with auto-populates the file with the following options:
{
  "compilerOptions": {
    "module": "commonjs",
    "target": "es6",
    "sourceMap": true
  },
  "exclude": [
    "node_modules"
  ]
}
This article won’t go into depth regarding possible options in the tsconfig.json file. For more on that, check out the official documentation. We will adjust a few options in a moment but for now, we’ll focus on a bare-bones project structure and project settings.
Step 3: Configure Ts-Node Support
Webstorm comes with a bundled TypeScript package that will be used by default once a tsconfig.json file is detected. However, we’re using a local version (installed with ts-node) for greater flexibility. The main advantage is that our project won’t rely on Webstorm — even though we’re using it. In addition to including the typescript package itself, ts-node offers some added features/benefits:
- Read-eval-print Loop (REPL) for continuous transcompilation
- Type checking
- Integrates with test-runners
- Automatic sourcemaps in stack traces
- Automatic tsconfig.json parsing
These features, among others, help justify the desire to extend the native support for TypeScript in Webstorm. To ensure ts-node is used fully, we need to configure Webstorm to use the local typescript package in the node_modules directory of our project. This is done by selecting the local package in the TypeScript configuration menu in Webstorm located in Settings > Languages and Frameworks > TypeScript:
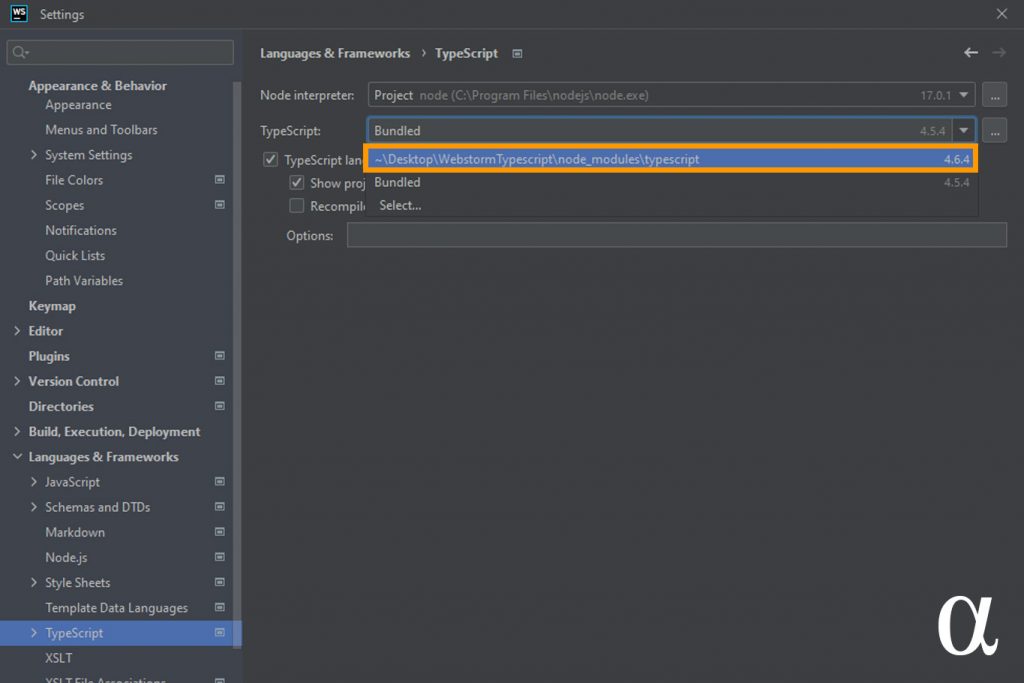
Optionally, the “Recompile on changes” option can be enabled to — as the name implies — ensure that all .ts or .tsx files are recompiled into .js files when changes are detected. Click Apply and then Ok to exit while saving changes.
Step 3: Configure TSConfig.json
Our current tsconfig.json file does little more than indicate that our project is configured for TypeScript. We’ll specify some options to help harness some useful features of Node.js, the typescript module, and ts-node. Note that Webstorm code-completion suggestions will now be available for TypeScript-native features including tsconfig.json options and values:
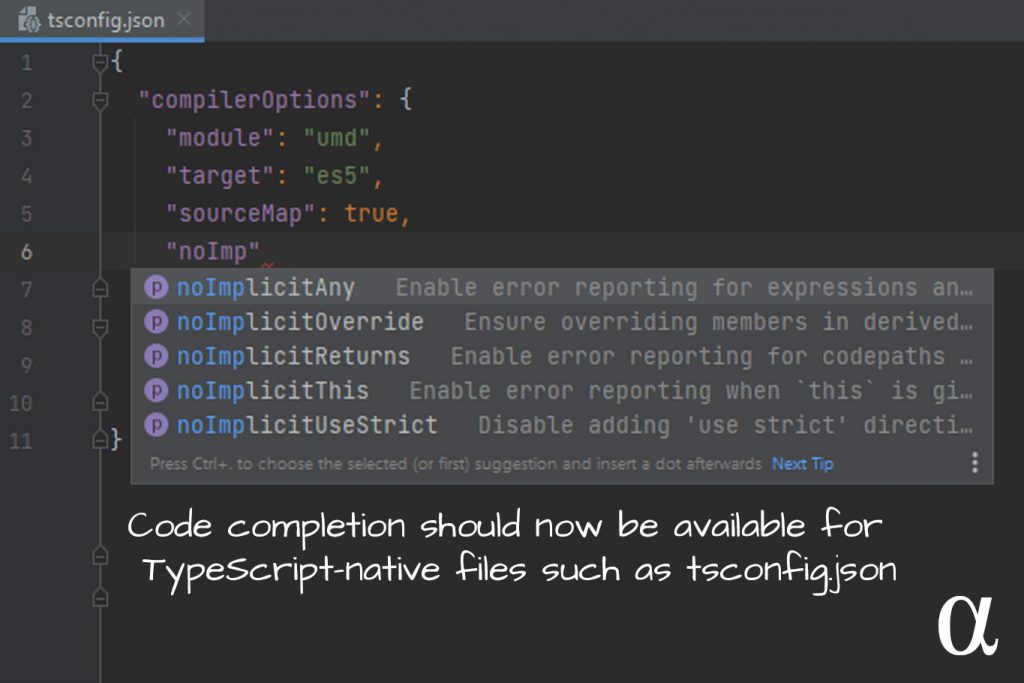
Below is a list and a brief description of the options we will be adding, their values, and the motivation for doing so:
- module: umd – specifies a project to be loaded as a module in a module-supporting environment or, if module use is not supported, to be loaded as a global. (read here)
- noImplicitAny: true – Instructs the typescript compiler to enforce strict typing such that any types are not allowed as fallbacks (read here)
- strictNullChecks: true – Instructs the compiler to make sure objects are checked for values of null or undefined. (read here)
- moduleResolution: node – TypeScript recommends
commonjsas a value here but we’re usingnodefor deep node.js support.
The tsconfig.json file allows for great complexity if one chooses or if a project dictates the need. The updated version of our tsconfig.json file is as follows:
{
  "compilerOptions": {
    "module": "commonjs",
    "target": "es6",
    "sourceMap": true,
    "noImplicitAny": true,
    "moduleResolution": "node",
  },
  "exclude": [
    "node_modules"
  ]
}
This is good for now, though in the next steps we’ll be adding some extra options based on our project’s structure.
Step 4: Project Structure & Files
Our project is bare-bones currently and needs some basic structure to demonstrate what the TypeScript transpiler does and how it does it. We’ll be adding two sub-directories to our project: src and dist and an index.ts file in the src directory. The project structure now reflects the following:
.
└── WebstormTypescript/
    ├── node_modules
    ├── dist
    ├── src/
    │   └── index.ts
    ├── package.json
    ├── package-lock.json
    └── tsconfig.json
Unless something has gone wrong, ts-node’s REPL service will create a compiled version of index.ts along with a index.js.map file which will appear in the src directory alongside the index.ts file—which should all be degrees of blank varying from completely blank to functionally blank. This confirms that ts-node, typescript, and Webstorm are all playing nicely, but also raises some questions about the need for the dist directory. Let us now revisit the tsconfig.json file and configure a more controlled emission of compiled .ts files.
Step 5: Configure Emission Options
Emission options — a.k.a. compiler output options — instruct the typescript compiler on how to handle .ts files and the resulting .js files. Specifically, our concern will be focused on the two following areas:
- Which
.tsfiles will be compiled - Where the compiled
.jsfiles will be emitted
These concerns can be addressed via the outDir and include options in the tsconfig.json file. The first is added within the compilerOptions group and the latter is a separate top-level group.
Via each of these options, we’ll specify values that instruct the typescript compiler to recursively compile all .ts files in the src directory and emmit those files in the dist directory. Our tsconfig.json file will be updated as follows:
{
  "compilerOptions": {
    "module": "commonjs",        // default
    "target": "es6",
    "sourceMap": true,
    "noImplicitAny": true,
    "moduleResolution": "node",  // default
    "outDir": "dist",
  },
  "include": [
    "src/**/*"
  ],
  "exclude": [
    "node_modules"
  ]
}
Note the inclusion of the module and moduleResolution options here. The values commonjs and node are defaults unless otherwise specified and included here for the sake of being explicit only.
At this point, we are ready to take TypeScript’s compiler for a whirl and see where we end up. Before we do that however, there are some important points to note:
- TypeScript’s compiler allows all files to compile down to a single file, specified via a
"outFile"option in thecompilerOptionsgroup in thetsconfig.jsonfile. However, this can only be done if the"module"value is set to"amd"or"system.". - As it stands, our files will all be compiled as separate files, including any sub-directory hierarchy that might be present in the
srcdirectory. - A tool like
webpackcan be used to combine all files during compilation but is beyond the scope of this article. See here for info.
Step 6: Adding Sample Code
Compiling blank files is both boring and not illustrative of TypeScript, the typescript compiler, or the resulting JavaScript. The following three files and content are being added to demonstrate how all this actually works — albeit in a very contrived example.
src/index.ts
import {broadcast} from "./utils/helpers";
import {Greeting} from "./enums/greetings";

// Print a hello message to the console
for (const value in Greeting){
    broadcast(`${value.toLowerCase()}, world!`);
}
src/enums/greetings.ts
/**
 * A simple enum with various greetings
 */
export enum Greeting{
    HELLO   = "Hello",
    HOWDY   = "Howdy",
    YO      = "Yo"
}
src/utils/helpers.ts
/**
 * A simple function that prints a message to the console.
 * @param msg - the string message to be printed
 */
export function broadcast(msg: string): void {
    console.log(msg);
}
This code reflects three files, two subdirectories, and one for loop that prints out three greetings to the console. The use of the enum in the src/enums/greetings.ts file reflects something TypeScript provides that vanilla JavaScript does not. Note I have added string values to the enum values here to make iterating over the Greeting enum easier.
Step 7: Compiling & Running
Webstorm should automatically compile everything in the src directory, including the directories and files in enums and utils into .js versions in the dist directory. If for some reason Webstorm has not done this, typing the npx tsc command in the terminal will do the same. Below is the resulting project structure, including sub-directories and files, after compiling all the TypeScript files:
.
└── WebstormTypescript/
    ├── node_modules
    ├── dist/
    │   ├── enums/
    │   │   ├── greeting.js
    │   │   └── greeting.js.map
    │   ├── utils/
    │   │   ├── helpers.js
    │   │   └── helpers.js.map
    │   ├── index.js
    │   └── index.js.map
    ├── src/
    │   ├── enums/
    │   │   └── greeting.ts
    │   ├── utils/
    │   │   └── helpers.ts
    │   └── index.ts
    ├── package.json
    ├── package-lock.json
    └── tsconfig.json
We can run the index.js file directly via Webstorm by right-clicking within the file open in the editor and selecting run. Alternatively, enter the command node dist/index.js in the Webstorm terminal. In either case, the following output should be visible in the WebStorm terminal:
hello, world!
howdy, world!
yo, world!
There we have it — TypeScript configured in Webstorm that still allows for the project to exist unbound to Webstorm. We can run this code effortlessly in a Node.js environment but still require some tweaking before it can be run in a browser — modern browsers don’t support the use of modules (at least not yet!).
The issue is because we are importing from multiple files (enums, utils, etc.) I’ve seen hacks, workarounds, and configurations ranging from clever to disgustingly complex hellbent on addressing this issue. The source of our woes is in the following two lines of code in our index.ts:
import {broadcast} from "./utils/helpers";
import {Greeting} from "./enums/greetings";
If we’re using a single file, devoid of imports/exports, this wouldn’t be an issue. However, the browser can’t handle the import/export statements thus our code is currently confined to command-line execution via node.js. Rather than dredging through hacky approaches, we’ll address this simply via Webpack.
Step 8: Configure Webpack for Browser Support
Webpack is a bundling tool used (among other things) to combine a bunch of JavaScript and/or TypeScript files into a single file. In this approach, we keep the flexibility of using multiple files without losing the ability to launch our application in a browser. To add Webpack support to our Typescript project we need only install two additional packages via npm:
- webpack – The core functionality of webpack
- ts-loader – Integration for bundling TypeScript files
Both of these can be installed with the following command:
npm install --save-dev webpack ts-loader
After the npm package manager installs these packages we need to tweak our package.json file and add a new webpack.config.js file — the file used to configure Webpack’s bundling options.
Step 8.a: Update package.json
The package.json file gets a new path for the "main" entry and a new top-level scripts section with a build command targeting webpack. The updated file is as follows:
{
  "name": "typescript-ws-config",
  "version": "1.0.0",
  "description": "Just configuring typescript with Webstorm",
  "main": "dist/main.js",
  "author": "Zack West <alphazwest@gmail.com>",
  "license": "MIT",
  "devDependencies": {
    "ts-loader": "^9.3.0",
    "ts-node": "^10.7.0",
    "webpack": "^5.72.0"
  },
  "scripts": {
    "build": "webpack"
  }
}
Note also the ts-loader and webpack dependencies that have been added. Optionally, the webpack-cli can be installed to issue build commands via the command line. Webstorm integrates well with webpack so we’re skipping over this one for now. The scripts.build = "webpack" entry in this file is recognized by Webstorm and will help run webpack once it’s configured.
Step 8.b: Configure webpack.config.js
The webpack.config.js file can get complex because webpack can be used for a lot of things. Fortunately, our use-case is fairly simple so our configuration file will be as well. The essentials are as follows:
- mode – tl;dr the format of the resulting output file. A value of production will produce a minified file that is not very pretty to look at. A value of ‘none’ is useful to show the basic formatting that happens.
- entry – specifies the primary TypeScript file from which the resulting file will reference during bundling
- output – specifies the target output file (bundled file) which in this case is
main.js - resolve.extensions – tells webpack which order files should be used (read here)
- modules.rules – Tells webpack to integrate with ts-loader and to ignore the node_modules directory when searching for files to bundle.
These reflect a minimal webpack configuration file that should be enough to get our project running in the browser. The following is how this file looks in the proper json format:
const path = require('path');

module.exports = {
    mode: 'production',
    entry: './src/index.ts',
    output: {
        path: path.resolve(__dirname, 'dist'),
        filename: 'main.js'
    },
    resolve: {
        extensions: ['.ts']
    },
    module: {
        rules: [
            {
                use: 'ts-loader',
                exclude: /node_modules/,
            }
        ]
    }
};
Webpack is a powerful package that intelligently collects code imported throghout a project. Even with the minimal settings we have above, webpack will begin with our index.ts file, construct a dependency graph (tree) and pull in only what is essential — read here for more on that.
Step 8.c: Run Webpack via Webstorm
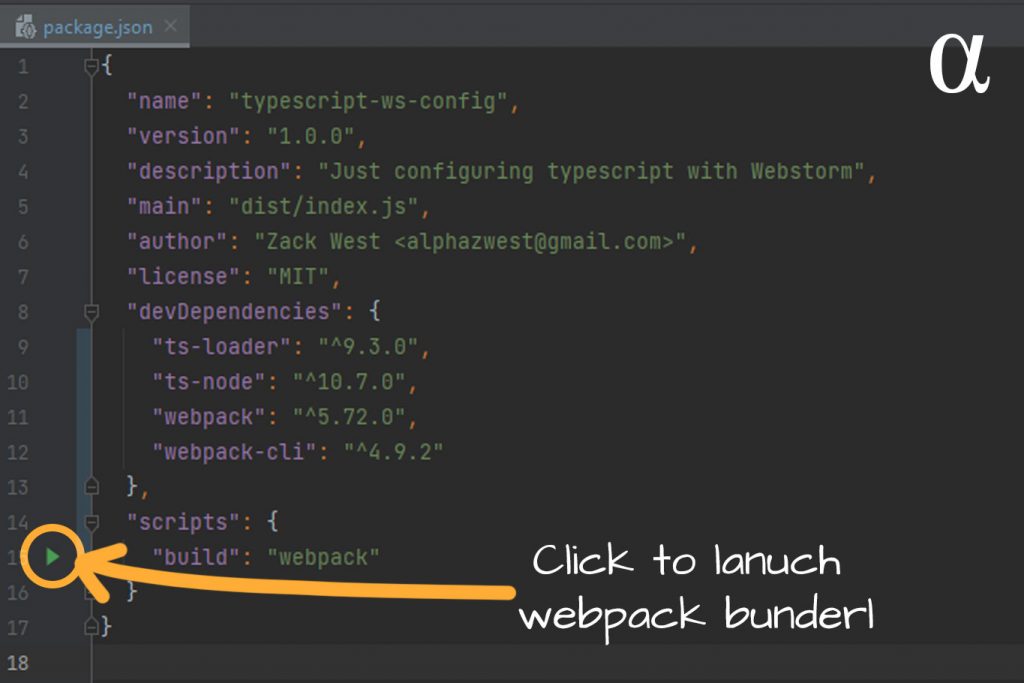
Webstorm offers dynamic run options for many languages. When viewing the package.json file, there will be a tiny little green arrow representing a start button next to the "build": "webpack" entry in the scripts section. Click this button and webpack will do its thing. Output similar to the following should appear in the run window of Webstorm:
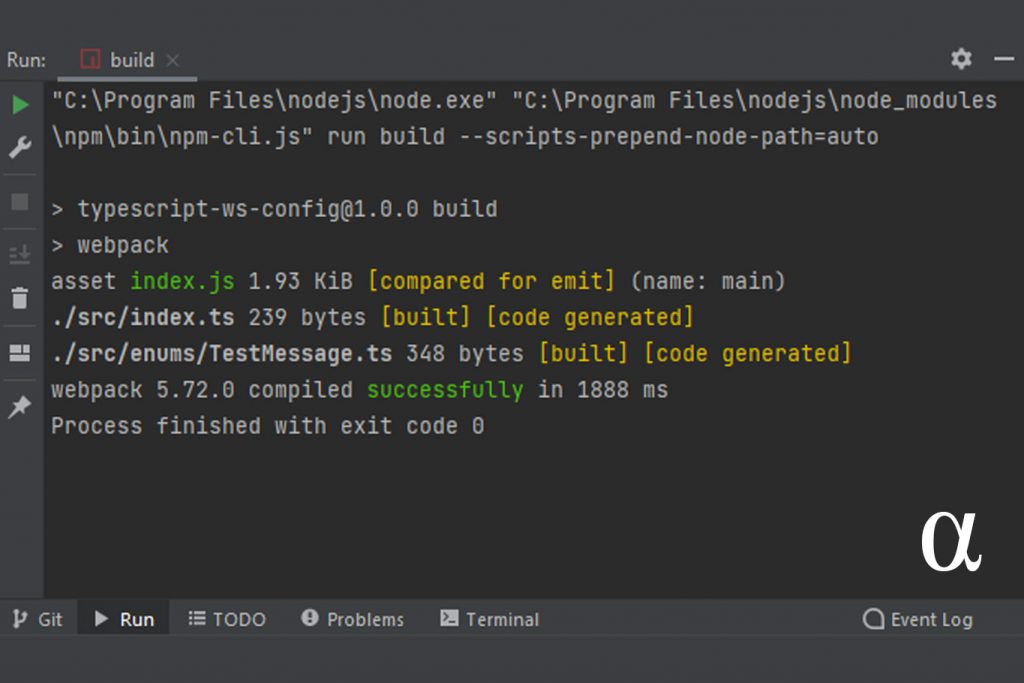
At this point, a new file named main.js will appear in the dist directory in our project. This file can be loaded safely in internet browsers and will get rid of the Uncaught ReferenceError: exports is not defined message in the console view.
Github
We’ve covered a lot of ground in this article for such a basic setup. I certainly felt frustrated when I first researched how to get a TypeScript project set up to run in a browser. If you’ve made it to this point in the article you are truly determined and destined for great things. To save you having to read through it again, all the code covered here is kept on Github here — use it freely.
Note: With the addition of webpack-cli this project can be compiled to JavaScript and bundled via the following commands:
npx tsc
npm run webpack
Final Thoughts
TypeScript brings a host of language constructs such as enums and static typing to JavaScript applications. It helps structure projects in a way that’s easier to scale, test, and maintain. Webstorm integrates with TypeScript natively but using a package manager like npm and the ts-node package can help ensure your project isn’t overly tethered.
In this article, we’ve seen the ease-of-use in which TypeScript can be set up, but also some obvious downfalls in the limitation of compiling imported code across multiple files in a way web browsers can handle. Fortunately, tools like webpack are available and can easily be configured to handle such cases. Check out the article Configuring TypeScript and Webpack for ThreeJS to see how this approach can be used to accommodate popular JavaScript librarires.


