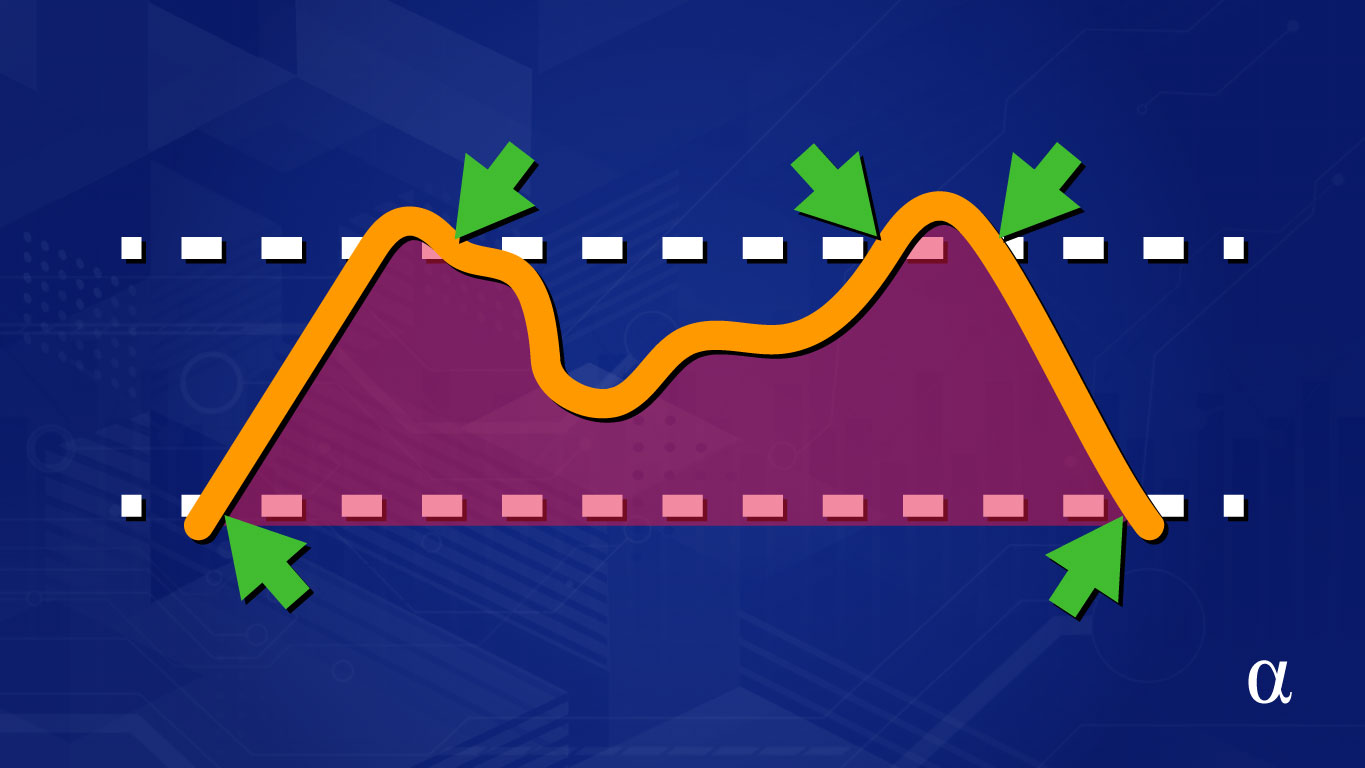
The Relative Strength Index (RSI) is a momentum indicator that describes the current price relative to average high and low prices over a previous trading period. This indicator estimates overbought or oversold status and helps spot trend reversals, price pullbacks, and the emergence of bullish or bearish markets.
The RSI can help signal lucrative entry/exit timings based on the current market dynamics. Combined with other momentum indicators like the Bollinger Bands and varying Moving Averages, the RSI serves as one of the most popular technical indicators used for systematic trading strategies. This article will introduce the RSI as a trading indicator and detail three ways it can be calculated using the Python programming language.
Highlights
- The history of the RSI, the benefits it brought, and the purpose for its use
- The parameters used in the RSI for generating overbought and oversold signals
- The steps required to calculate the RSI including Welles Wilder’s original smoothing function
- Alternatives to using the Wilder Smoothing Method for calculating average price gains and losses
- A brief discussion of sliding window algorithms and how they apply to calculate the RSI
- Three approaches to calculating the RSI in Python, the pros and cons of each, and validation of the resulting data.
Introduction
The Relative Strength Index (RSI) is a momentum oscillator that conveys buying and selling pressure in a given market. When applied to a single stock, a low RSI value indicates oversold status and a high value indicates oversold. Values for overbought are usually between 70-80 and those reflecting oversold status are between 20-30. These values can be adjusted based on trader preference.
The RSI was first introduced by J.Welles Wilder, Jr. in his 1978 book New Concepts in Technical Trading (Wilder, 1978). It was introduced as an improvement of current momentum oscillators that didn’t take measure price relative to recent changes.
The RSI provides recommendations to traders and has applications ranging from single-signal indications to complex combinations with other indicators. These combinations find the RSI integrated into machine learning, genetic, and complex algorithmic trading systems (Boboc, 2013; Tharavanij, 2015.)
History
Section six of Wilder’s New Concepts in Technical Trading outlines the first-ever public record of RSI calculation. This method made use of what has become known as the Wilder Moving Average (WMA) (a.k.a. Wilder’s Smoothing Method, Wilder Smoothing, etc.) More on that in a bit.
The introduction of the RSI starts by discussing tools known as momentum oscillators. Wilder notes the “slope of a momentum oscillator is directly proportional to the velocity of the move. The distance traveled up or down by the momentum oscillator is proportional to the magnitude of the move.” Wilder summarizes this by noting oscillators as measures of the rate of change of price movements.
Wilder notes three main issues with the momentum oscillators. These problems, he notes as likely to trip up all but those intimately familiar with the nature of their calculations (read as experts). These three problems are outlined as follows:
- Erratic movements within the oscillator;
- The scale of the Y-Axis doesn’t afford a relative measure to compare current and previous pricing;
- The requirement of retaining measures for all past periods to generate new calculations.
The Relative Strength Index (RSI) was then introduced as the solution to the above three problems. It uses a smoothing function to calm the erratic movements within momentum oscillators; it uses a standardization formula to ensure all values are placed on a scale of 0-100 for easy comparison; and finally, it only uses only the most recent periods data to generate the next periods’ value.
Note: The first RSI value requires several previous periods, defined as the lookback period (commonly 14), to generate a value. After that, only the most recent RSI value is required—more on that below.
Calculating the RSI
Wilder’s original formula for calculating the RSI was introduced in a stepwise manner along with two primary equations; the Relative Strength Index (RSI) and the Relative Strength (RS). The RS is a proportional measure of average price gains and average price losses and the RSI provides a standardized value from 0-to 100 to reflect that relationship. The formula for each is as follows:

Calculating the RSI first requires the RS which requires an average value of n-many previous trading days. A value of 14 days is common for the RSI calculation; it’s the value Wilder used and also the one we’ll be using for our examples here. The first RS value requires the price from all 14 of the first trading days. This is a common source of confusion with the RSI given successive values only require the most recent. Let’s walk through the process here before we start to develop our code:
- For 14 periods, calculate the difference in price from the current period and the previous period;
- For each period, record each positive change in price as a gain and each negative change as a loss;
- On the 14th period, calculate the arithmetic mean of the gains and losses for the entire 14 day period (e.g. gains / 14 & losses / 14);
- Use these values to calculate the RS
- Use the RS value to calculate the RSI
- For each proceeding period, use only the previous RSI value to calculate the next average value by multiplying by our lookback period – 1 (e.g. 13 for a lookback of 14).
- Add the value obtained in step 6 to the current day’s value (do this for both the gains and losses)
Step 6 implements the first iteration of Wilder’s Smoothing Average (WSA) and involves a more exotic type of weighted moving average. This is illustrated by the formalized by the following equation:

This equation is used to calculate the average gains and losses after the initial number of periods have values. The variables are explained as such:
- WSMpi – The current average value (for a gain or loss) (a.k.a WSA)
- WSMp (i-1) – The average value from the previous period (a.k.a WSA)
- α (alpha) – The size of our lookback period
- p – The current period’s measured price difference
Between the initial instructions and this equation, calculating the RSI sounds like a lot of work. To be fair, when introduced by Wilder, it really was. Wilder suggested traders used the following 10-column worksheet to aid in the calculations. See below:

The thought of having to make these calculations for any reasonable number of assets seems excruciating. Keep in mind this was long before intraday trading was available and daily (and often weekly) price action was the primary focus of technical analysis. Still, it highlights the advantages afforded to modern traders by tools like Python.
Before we start developing the code to calculate the RSI with Python let us first consider our approach. For this type of calculation, we will need to use what is referred to as a sliding window algorithm. This algorithm will be used for calculating our initial averages as well as those to follow.
Sliding Window Calculations
Sliding windows calculations are algorithmic approaches that provide dynamic values from a subset of other values. These approaches are utilized in network communications as part of reliable data transfer protocols (RDP) such as TCP/IP Protocol and statistical methods involving rolling averages.
Basically, sliding window algorithms have defined a window size that specifies the number of values within a set of values that are to be considered at any given time. For example, a Simple Moving Average (SMA) with a lookback period of 3 days only considers the 3-most recent prices for a stock. In this example, the 3-days represent the sliding window.
As the next period is considered, the window moves forward one position—while retaining its capacity—such that the oldest value is removed and the next value is added. This approach is described in the following illustration:

In the above illustration, each “window” of three values has an average value that can be calculated. The average changes as the window slides through the data. This type of average is also referred to as a “rolling” average. As a further example of sliding window calculations, consider the following diagram illustrating the removal of the previous value and addition of the next value into the current window:

Here we can see that, as the fourth element enters the window, the first element is removed. This represents the transition from the first to the second row in the first image above. Check out this article for a more rigorous discussion of sliding window algorithms. The basic understanding we’ve developed here should be enough to help us approach calculating the RSI.
Data Preparation
We will first approach calculating the RSI using vanilla Python only. Then after having developed a sense of frustration, we will move on to calculating the RSI with some assistance from the Pandas library. Then, we will remove the last of our frustrations by implementing a one-liner afforded by the pandas_ta library.
For these calculations, we will be using the sample data given by Wilder in his original introduction of the RSI. This data is available via Github as a CSV file containing the period and price. The following code will load the data into Python for our calculations:
# Load the data via Python's CSV module
with open('wilder-rsi-data.csv', 'r')as file:
    reader = csv.reader(file)
    header = next(reader)  # skip the header
    data = [row[1] for row in list(reader)]

# View the Data
print (data)

# Our data, as a native Python List
['54.8', '56.8', '57.85', '59.85', '60.57', '61.1', '62.17', '60.6', '62.35', '62.15', '62.35', '61.45', '62.8', '61.37', '62.5', '62.57', '60.8', '59.37', '60.35', '62.35', '62.17', '62.55', '64.55', '64.37', '65.3', '64.42', '62.9', '61.6', '62.05', '60.05', '59.7', '60.9', '60.25', '58.27', '58.7', '57.72', '58.1', '58.2']
Calculating the RSI with Vanilla Python
This method will be the most involved with the least amount of abstraction from Wilder’s original instructions. To get started, we need to define some variables and initialize some containers for our sliding windows:
# Define our Lookback period (our sliding window)
window_length = 14

# Initialize containers for avg. gains and losses
gains = []
losses = []

# Create a container for current lookback prices
window = []

# Keeps track of previous average values
prev_avg_gain = None
prev_avg_loss = None

# Create a container for our final output (as a csv)
output = [['date', 'close', 'gain', 'loss', 'avg_gain', 'avg_loss', 'rsi']]
These variables will aid our calculation of the RSI. The output variable isn’t strictly necessary but we’ll use it to save out all of our calculations for comparison with Wilder’s. With our data in hand, we can now start calculating the RSI by first getting the price differences.
Note: All of our steps here will be done within the body of a for loop that is started in the first step below.
Step 1: Calculate the Price Differences
Calculating the price difference requires two prices—meaning our first period is effectively a null period for our calculations. We need to add a condition to handle this, and update our final output accordingly:
# Loop through an enumerated set of our data
# to keep track of which period we are currently
# making calculations for.
for i, price in enumerate(wilder_data):

    # keep track of the price for the first period
    # but don't calculate a difference value.
    if i == 0:
        window.append(price)
        output.append([i+1, price, 0, 0, 0, 0, 0])
        continue

    # After the first period, calculate the difference
    # between price and previous price as a rounded value
    difference = round(wilder_data[i] - wilder_data[i - 1], 2)
Here we have started our loop using the enumerate(data) syntax to provide us with an iterator variable i that will serve to easily keep track of which period we are considering. We also add the price to our sliding window (which will need 14 values before the RSI can be calculated) and append a row of data to our final output. After the first row, we calculate our price difference rounded to the nearest 2 decimals.
Note: We are rounding here to keep our final values as close to Wilder’s as possible. We’ll compare the final values of rounded/non-rounded later to get a feel for the loss of precision here.
Step 2: Calculate the Gains & Losses
We will now use the price difference to calculate the gains and losses for each period. Both the gains and losses will be recorded as positive values meaning given the nature of the RSI. We will record values of 0 for the gains where the difference is negative and 0’s for the losses where the difference is positive.
We will store these values in a sliding window as well for easy calculation as we move along. We will continue to loop through our prices until we have enough gains and losses to calculate our first RS value (14 periods in our case.) This is coded as such:
# Record positive differences as gains
if difference > 0:
    gain = difference
    loss = 0

# Record negative differences as losses
elif difference < 0:
    gain = 0
    loss = abs(difference)

# Record no movements as neutral
else:
    gain = 0
    loss = 0

# Save gains/losses
gains.append(gain)
losses.append(loss)

# Continue to iterate until enough
# gains/losses data is available to
# calculate the initial RS value
if i < window_length:
    window.append(price)
    output.append([i+1, price, gain, loss, 0, 0, 0])
    continue
Here we are accumulating the necessary gain and loss values to calculate our first average. We are also appending these data to our final output container as well.
Step 3: Calculate Average Gains & Losses
After our gains and losses accumulate we’ll calculate the Simple Moving Average (SMA) of these values across our lookback period. This is the equivalent of the arithmetic mean and has no weighting factor as used in other methods such as the Exponential Moving Average (EMA) or the Wilder Smoothing Method (WSM). However, calculations after the initial 14 periods will use a weighted calculation. This is coded as follows:
# Calculate SMA for first gain
if i == window_length:
    avg_gain = sum(gains) / len(gains)
    avg_loss = sum(losses) / len(losses)

# Use WSM after initial window-length period
else:
    avg_gain = (prev_avg_gain * (window_length - 1) + gain) / window_length
    avg_loss = (prev_avg_loss * (window_length - 1) + loss) / window_length

# Keep in memory
prev_avg_gain = avg_gain
prev_avg_loss = avg_loss

# Round for later comparison (optional)
avg_gain = round(avg_gain, 2)
avg_loss = round(avg_loss, 2)
prev_avg_gain = round(prev_avg_gain, 2)
prev_avg_loss = round(prev_avg_loss, 2)
The conditional statement handles the need for 14-periods of initial data and implements the SMA calculation. After that initial phase, we see the implementation of the WMA for calculating both the average gain and loss values using the prev_avg_gain and prev_avg_loss variables that have been retained from the previous iteration—and updated immediately after our calculations here.
The implementation of a smoothing method here (WSM) addresses the first problem with momentum oscillators Wilder noted: their erratic movements.
Note: We are rounding these values off for later comparison to Wilder’s sample data because that’s how it was implemented in New Concepts in Technical Trading Systems. For day-to-day use, these lines of code, along with any other rounding we do here, are not necessary and ill-advised.
Step 4: Calculate the RS Value
Here is where all our hard work begins to pay off. There is nothing fancy about this step and we simply implement the division of our average gains and losses to calculate the RS value:
# use avg. gains and losses to calculate
# the RS value rounded to the nearest
# 2 decimal places
rs = round(avg_gain / avg_loss, 2)
This value is a numerical representation of the relationship of price action across our lookback period. It affords us insight into the magnitude and velocity but isn’t standardized—the second problem with momentum oscillators noted by Wilder.
Step 5: Calculate the RSI Value
With our RS value in hand, we can now implement Wilder’s RSI formula to standardize our values (make the Relative) with the following code:
# use the RS value to calculate the
# RSI to the nearest 2 decimal places
rsi = round(100 - (100 / (1 + rs)), 2)
With this, our hard work has finally paid off and we’ve addressed the second problem with momentum oscillators and normalized all of our values to the scale of 0-100. This completes our RSI calculation but we need to wrap a few things up to prepare for the next iteration and maintain our output.
Step 6: House-Keeping
This final step is a Python-only requirement and not strictly reflective of any such steps outlined by Wilder. We need to update our sliding windows for gains, losses, and prices and also save our current values as the next line in our output container. This is achieved by the following code:
# Remove oldest values
window.append(price)
window.pop(0)
gains.pop(0)
losses.pop(0)

# Save Data
output.append([i+1, price, gain, loss, avg_gain, avg_loss, rsi])
Step 7: Save Output Data
At this point, all our RSI calculations have been made and our output container is holding all the results. We’ll save this out as a CSV file using Python’s standard CSV library so we can easily re-load and compare to Wilder’s calculations without having to crunch all the numbers again. The following code will handle this:
import csv

# Create a new CSV file to store output data
with open('wilder-rsi-data.csv', 'w', newline='') as file:
    writer = csv.writer(file)
    writer.writerows(output)
Step 8: Validation
Now we need to ensure our implementation of the RSI is consistent with Wilder’s original specifications. To do this, we’ll compare our output data with the sample calculations provided by Wilder. First, let’s look at our final output data:
| date | close | gain | loss | avg_gain | avg_loss | rsi |
|---|---|---|---|---|---|---|
| 1 | 54.8 | 0 | 0 | 0 | 0 | 0 |
| 2 | 56.8 | 2 | 0 | 0 | 0 | 0 |
| 3 | 57.85 | 1.05 | 0 | 0 | 0 | 0 |
| 4 | 59.85 | 2 | 0 | 0 | 0 | 0 |
| 5 | 60.57 | 0.72 | 0 | 0 | 0 | 0 |
| 6 | 61.1 | 0.53 | 0 | 0 | 0 | 0 |
| 7 | 62.17 | 1.07 | 0 | 0 | 0 | 0 |
| 8 | 60.6 | 0 | 1.57 | 0 | 0 | 0 |
| 9 | 62.35 | 1.75 | 0 | 0 | 0 | 0 |
| 10 | 62.15 | 0 | 0.2 | 0 | 0 | 0 |
| 11 | 62.35 | 0.2 | 0 | 0 | 0 | 0 |
| 12 | 61.45 | 0 | 0.9 | 0 | 0 | 0 |
| 13 | 62.8 | 1.35 | 0 | 0 | 0 | 0 |
| 14 | 61.37 | 0 | 1.43 | 0 | 0 | 0 |
| 15 | 62.5 | 1.13 | 0 | 0.84 | 0.29 | 74.36 |
| 16 | 62.57 | 0.07 | 0 | 0.79 | 0.27 | 74.55 |
| 17 | 60.8 | 0 | 1.77 | 0.73 | 0.38 | 65.75 |
| 18 | 59.37 | 0 | 1.43 | 0.68 | 0.46 | 59.68 |
| 19 | 60.35 | 0.98 | 0 | 0.7 | 0.43 | 61.98 |
| 20 | 62.35 | 2 | 0 | 0.79 | 0.4 | 66.44 |
| 21 | 62.17 | 0 | 0.18 | 0.73 | 0.38 | 65.75 |
| 22 | 62.55 | 0.38 | 0 | 0.71 | 0.35 | 67 |
| 23 | 64.55 | 2 | 0 | 0.8 | 0.33 | 70.76 |
| 24 | 64.37 | 0 | 0.18 | 0.74 | 0.32 | 69.79 |
| 25 | 65.3 | 0.93 | 0 | 0.75 | 0.3 | 71.43 |
| 26 | 64.42 | 0 | 0.88 | 0.7 | 0.34 | 67.32 |
| 27 | 62.9 | 0 | 1.52 | 0.65 | 0.42 | 60.78 |
| 28 | 61.6 | 0 | 1.3 | 0.6 | 0.48 | 55.56 |
| 29 | 62.05 | 0.45 | 0 | 0.59 | 0.45 | 56.71 |
| 30 | 60.05 | 0 | 2 | 0.55 | 0.56 | 49.49 |
| 31 | 59.7 | 0 | 0.35 | 0.51 | 0.55 | 48.19 |
| 32 | 60.9 | 1.2 | 0 | 0.56 | 0.51 | 52.38 |
| 33 | 60.25 | 0 | 0.65 | 0.52 | 0.52 | 50 |
| 34 | 58.27 | 0 | 1.98 | 0.48 | 0.62 | 43.5 |
| 35 | 58.7 | 0.43 | 0 | 0.48 | 0.58 | 45.36 |
| 36 | 57.72 | 0 | 0.98 | 0.45 | 0.61 | 42.53 |
| 37 | 58.1 | 0.38 | 0 | 0.45 | 0.57 | 44.13 |
| 38 | 58.2 | 0.1 | 0 | 0.42 | 0.53 | 44.13 |
There are several things to note here, fortunately, all of which serve to validate our implementation:
- There are 0’s in both the gain and loss columns indicating that our price differences were segregated correctly
- Our first RS value doesn’t appear until the 15th row which represents the first period in which we had 14 previous days’ data;
- Our first RSI value doesn’t appear until the 15th row, also representing the first period in which we had 14 days previous days’ data
- We have RS & RSI values for every remaining period indicating that our algorithm continued executing.
Now we need to compare our final results with those of Wilder’s and measure any discrepancies. We’ll take the RSI values from the worksheet shown at the beginning of this tutorial and compare them with the RSI values from our implementation. This comparison is shown in the table below:
| our RSI | Wilders’ RSI | Difference | % Difference |
|---|---|---|---|
| 74.36 | 74.36 | 0 | 0 |
| 74.55 | 74.55 | 0 | 0 |
| 65.75 | 65.75 | 0 | 0 |
| 59.68 | 59.68 | 0 | 0 |
| 61.98 | 61.98 | 0 | 0 |
| 66.44 | 66.44 | 0 | 0 |
| 65.75 | 65.75 | 0 | 0 |
| 67 | 67 | 0 | 0 |
| 70.76 | 71.43 | 0.67 | 0.94 |
| 69.79 | 70.5 | 0.71 | 1.01 |
| 71.43 | 72.14 | 0.71 | 0.98 |
| 67.32 | 67.95 | 0.63 | 0.93 |
| 60.78 | 60.78 | 0 | 0 |
| 55.56 | 55.56 | 0 | 0 |
| 56.71 | 56.71 | 0 | 0 |
| 49.49 | 49.49 | 0 | 0 |
| 48.19 | 48.19 | 0 | 0 |
| 52.38 | 52.38 | 0 | 0 |
| 50 | 50 | 0 | 0 |
| 43.5 | 43.5 | 0 | 0 |
| 45.36 | 45.36 | 0 | 0 |
| 42.53 | 42.53 | 0 | 0 |
| 44.13 | 44.14 | 0.01 | 0.02 |
| 44.13 | 44.75 | 0.62 | 1.39 |
There are only six cases where our calculations weren’t exact matches to Wilder’s. After considering these data for some time, I felt it was safe to write these off as rounding errors. Note these are values that reflect our use of the round() function throughout our implementation. Higher precision would lead to more variance here which but ultimately more accurate RSI calculations.
Note: Our implementation here is available as a single function available on Github.
Calculating the RSI with Pandas
The Pandas library for Python is an incredible utility for data analysis. It is highly optimized for dealing with large datasets, comes with a dizzying array of built-in functions, and is used by many other analytical packages as an integral data handler.
Simply put; if you’re wrangling data Pandas should be in your toolkit. For our purposes here, we’ll take advantage of some built-in weighted moving average functions, some mean calculations, and streamlined syntax. Let’s start by loading the same data as a Pandas DataFrame object. The following code details our approach:
import pandas as pd

# Load our sample CSV data as DataFrame
df = pd.read_csv('./data/wilder-rsi-data.csv', header=0).set_index(['period'])

# View the result
print(df.head())

        price
period
1       54.80
2       56.80
3       57.85
4       59.85
5       60.57

# View summary
print(df.info())

<class 'pandas.core.frame.DataFrame'>
Int64Index: 38 entries, 1 to 38
Data columns (total 1 columns):
 #   Column  Non-Null Count  Dtype
---  ------  --------------  -----
 0   price   38 non-null     float64
dtypes: float64(1)
memory usage: 608.0 bytes
Here we have used the read_csv method to load our data directly into a Pandas DataFrame. We have then used the header=0 argument to inform Pandas the first line of our data is the header (index 0 being the first line,) and then used the set_index(['period']) command to use our values in the first column as the index of our DataFrame.
The following df.head() argument prints the first 5 rows (default value) and df.info() prints some summary statistics letting us know we have 38 rows on non-null float values (as expected!) With our data loaded, we can now begin to calculate the Relative Strength Index using Pandas!
Step 1: Calculate Price Differences
The main advantage we’ll see using Pandas is that we no longer have to manage our sliding window manually. This is first seen as we calculate the price differences between each daily price and the previous:
# Calculate Price Differences
df['diff'] = df.diff(1)

# View Results
print(df)

        price  diff
period
1       54.80   NaN
2       56.80  2.00
3       57.85  1.05
4       59.85  2.00
5       60.57  0.72
...       ...   ...
34      58.27 -1.98
35      58.70  0.43
36      57.72 -0.98
37      58.10  0.38
38      58.20  0.10

[38 rows x 2 columns]
Here we see differences calculated for all but the first row in our data, as expected.
Step 2: Calculate Gains & Losses
We get another pleasant surprise when calculating our gains in losses in our ability to use the clip() function provided by our DataFrame object. This function says “keep all values above or below a given threshold.” In our case, we set an upper threshold of 0 for our loss and a lower threshold of 0 for our gain. This is done in the following lines of code:
# Calculate Avg. Gains/Losses
df['gain'] = df['diff'].clip(lower=0).round(2)
df['loss'] = df['diff'].clip(upper=0).abs().round(2)

# View Result
print(df)

period
1       54.80   NaN   NaN   NaN
2       56.80  2.00  2.00  0.00
3       57.85  1.05  1.05  0.00
4       59.85  2.00  2.00  0.00
5       60.57  0.72  0.72  0.00
...       ...   ...   ...   ...
34      58.27 -1.98  0.00  1.98
35      58.70  0.43  0.43  0.00
36      57.72 -0.98  0.00  0.98
37      58.10  0.38  0.38  0.00
38      58.20  0.10  0.10  0.00

[38 rows x 4 columns]
Step 3: Calculate Average Gains & Losses
Implementing Wilder’s RSI method will require some creativity. First, we’re going to create an SMA value using our previous values’ first n-periods (14 in this case). We’re going to use a placeholder of NaN after that, as we’ll be implementing the WSM again for those values. First, let’s get our SMA:
# Get initial Averages
df['avg_gain'] = df['gain'].rolling(window=window_length, min_periods=window_length).mean()[:window_length+1]
df['avg_loss'] = df['loss'].rolling(window=window_length, min_periods=window_length).mean()[:window_length+1]

# View Result
print(df)

# View first SMA value
print(df.iloc[window_length-1: window_length+2])

        price  diff  gain  loss  avg_gain  avg_loss
period
14      61.37 -1.43  0.00  1.43       NaN       NaN
15      62.50  1.13  1.13  0.00  0.842857  0.292857
16      62.57  0.07  0.07  0.00       NaN       NaN
Here, we can see that an SMA value has been calculated for the first window_length periods and NaN values have been added for all other periods after. This leaves us with the WSM average implementation. Unfortunately, Pandas doesn’t have any built-in method for this so we’ll be manually implementing this again in the following code:
# Get WMS averages
# Average Gains
for i, row in enumerate(df['avg_gain'].iloc[window_length+1:]):
    df['avg_gain'].iloc[i + window_length + 1] =\
        (df['avg_gain'].iloc[i + window_length] *
         (window_length - 1) +
         df['gain'].iloc[i + window_length + 1])\
        / window_length

# Average Losses
for i, row in enumerate(df['avg_loss'].iloc[window_length+1:]):
    df['avg_loss'].iloc[i + window_length + 1] =\
        (df['avg_loss'].iloc[i + window_length] *
         (window_length - 1) +
         df['loss'].iloc[i + window_length + 1])\
        / window_length

# View initial results
print(df[window_length-1:window_length+5])

        price  diff  gain  loss  avg_gain  avg_loss
period
14      61.37 -1.43  0.00  1.43       NaN       NaN
15      62.50  1.13  1.13  0.00  0.842857  0.292857
16      62.57  0.07  0.07  0.00  0.787653  0.271939
17      60.80 -1.77  0.00  1.77  0.731392  0.378943
18      59.37 -1.43  0.00  1.43  0.679150  0.454019
19      60.35  0.98  0.98  0.00  0.700639  0.421589
Here we see two new columns added to account for our average gains and losses. So far, these values look to be on par with those calculated in our previous vanilla Python implementation. Next up, we calculate our RS values.
Step 4: Calculate the RS Value
This step only requires our creation of a new column in our DataFrame to which we assign the resulting values of dividing the average gains by the average losses from our previous calculation. This is a one-liner, illustrated in the code below:
# Calculate RS Values
df['rs'] = df['avg_gain'] / df['avg_loss']
Step 5: Calculate the RSI
Here we use our previous RS values to apply the rsi = 100 - (100 / (1.0 + RS)) equation outlined by Wilder in New Concepts in Technical Trading Systems. This results in the creation of a new RSI column, achieved by the following code:
# Calculate RSI
df['rsi'] = 100 - (100 / (1.0 + df['rs']))

# View Result
print(df)

        price  diff  gain  loss  avg_gain  avg_loss        rs        rsi
period
1       54.80   NaN   NaN   NaN       NaN       NaN       NaN        NaN
2       56.80  2.00  2.00  0.00       NaN       NaN       NaN        NaN
3       57.85  1.05  1.05  0.00       NaN       NaN       NaN        NaN
4       59.85  2.00  2.00  0.00       NaN       NaN       NaN        NaN
5       60.57  0.72  0.72  0.00       NaN       NaN       NaN        NaN
...       ...   ...   ...   ...       ...       ...       ...        ...
34      58.27 -1.98  0.00  1.98  0.485716  0.619412  0.784157  43.951108
35      58.70  0.43  0.43  0.00  0.481736  0.575169  0.837557  45.579922
36      57.72 -0.98  0.00  0.98  0.447327  0.604085  0.740503  42.545340
37      58.10  0.38  0.38  0.00  0.442518  0.560936  0.788891  44.099456
38      58.20  0.10  0.10  0.00  0.418052  0.520869  0.802605  44.524721

[38 rows x 8 columns]
Here we see the results of our labors so far, with both the RS and RSI columns added to our data. Now that we have our data we can leverage the power of Pandas once again to save to a CSV file.
Step 6: Save Data
Just as Pandas provided us with a method to load our data it also provides us a means to save our expanded data using the pd.to_csv() method. This method can be customized for a wide range of preferences but here we’ll only be specifying the output path and accepting the defaults for everything else:
# Save dataframe as CSV
df.to_csv('wilder-rsi-pandas-output.csv')
This method returns a None object unless it is written to a buffer object. This will result in a local file named wilder-rsi-pandas-output.csv saved in our current working directory. This marks the end of our calculations but we still need to validate our data once again to ensure our implementation hasn’t gone awry.
Step 7: Validate Results
At first glance, our values for RSI appear to be almost identical to those calculated in our previous implementation. To confirm, we’ll validate our data once again. Fortunately, this time we can do all this in Pandas (rather than the CSV done behind the scenes last time!)
# Validation list
WILDER_RSI_VALUES = [
    74.36, 74.55, 65.75, 59.68, 61.98, 66.44, 65.75, 67.0, 71.43,
    70.5, 72.14, 67.95, 60.78, 55.56, 56.71, 49.49, 48.19, 52.38,
    50.0, 43.5, 45.36, 42.53, 44.14, 44.75
]

# Load in the validation data + create NaN values preceding our first RSI calculations
v = pd.DataFrame(pd.concat([pd.Series(["NaN"] * (window_length)), pd.Series(WILDER_RSI)])).reset_index(level=0).drop(['index'], axis=1)
v.index = list(range(1, len(v) + 1))  # reindex starting with 0

# Calculate differences
df['diff_rsi'] = ((df['rsi'] - v.values).abs())
df['diff_pct'] = ((df['rsi'] - v.values) / v.values * 100).abs()

# Round off for easy comparison
df['diff_rsi'] = df['diff_rsi'].apply(lambda x: round(x, 2))
df['diff_pct'] = df['diff_pct'].apply(lambda x: round(x, 2))

# View Results
print(df)

        price  diff  gain  loss  ...        rs        rsi  diff_rsi  diff_pct
period                           ...
15      62.50  1.13  1.13  0.00  ...  2.878049  74.213836      0.15      0.20
16      62.57  0.07  0.07  0.00  ...  2.896435  74.335516      0.21      0.29
17      60.80 -1.77  0.00  1.77  ...  1.930084  65.871286      0.12      0.18
18      59.37 -1.43  0.00  1.43  ...  1.495863  59.933704      0.25      0.43
19      60.35  0.98  0.98  0.00  ...  1.661902  62.432876      0.45      0.73
20      62.35  2.00  2.00  0.00  ...  2.026822  66.962047      0.52      0.79
21      62.17 -0.18  0.00  0.18  ...  1.957584  66.188617      0.44      0.67
22      62.55  0.38  0.38  0.00  ...  2.035249  67.053772      0.05      0.08
23      64.55  2.00  2.00  0.00  ...  2.475455  71.226792      0.20      0.28
24      64.37 -0.18  0.00  0.18  ...  2.374159  70.362986      0.14      0.19
25      65.30  0.93  0.93  0.00  ...  2.601844  72.236440      0.10      0.13
26      64.42 -0.88  0.00  0.88  ...  2.111859  67.864864      0.09      0.13
27      62.90 -1.52  0.00  1.52  ...  1.563986  60.998221      0.22      0.36
28      61.60 -1.30  0.00  1.30  ...  1.262352  55.798210      0.24      0.43
29      62.05  0.45  0.45  0.00  ...  1.334247  57.159636      0.45      0.79
30      60.05 -2.00  0.00  2.00  ...  0.992659  49.815793      0.33      0.66
31      59.70 -0.35  0.00  0.35  ...  0.946968  48.638097      0.45      0.93
32      60.90  1.20  1.20  0.00  ...  1.116919  52.761538      0.38      0.73
33      60.25 -0.65  0.00  0.65  ...  1.016177  50.401189      0.40      0.80
34      58.27 -1.98  0.00  1.98  ...  0.784157  43.951108      0.45      1.04
35      58.70  0.43  0.43  0.00  ...  0.837557  45.579922      0.22      0.48
36      57.72 -0.98  0.00  0.98  ...  0.740503  42.545340      0.02      0.04
37      58.10  0.38  0.38  0.00  ...  0.788891  44.099456      0.04      0.09
38      58.20  0.10  0.10  0.00  ...  0.802605  44.524721      0.23      0.50
We can see here that our RSI values are very close to Wilder’s, with the greatest variance being 1.04% for the 34th row. These differences are due to our calculations being of higher precision in Pandas than Wilder’s original data that was rounded to the second decimal place.
Note: The implementation here is available as a function on Github
Calculating the RSI with Pandas_TA
The pandas_ta library is a convenient tool that is integrated with the Pandas library such that technical indicators are accessible as DataFrame methods. This makes for incredibly convenient calculations—including those for the RSI.
This library comes with over 100+ technical indicators. It will use the TA-Lib where possible otherwise pandas_ta will make calculations with its own implementations.
This approach at calculating the Relative Strength Index (RSI) in Python requires much less syntax. We will again load our sample data into memory as a Pandas DataFrame object. With this, we can use pandas_ta to calculate the RSI as shown in the following code:
import pandas as pd
import pandas_ta as ta

# Load the data
df = pd.read_csv('wilder-rsi-data.csv', header=0).set_index(['period'])

# Calculate the RSI via pandas_ta
df.rsi(close='price', length=length, append=True)

# View the result
print(df)

        price       RSI_14
period
1       54.80          NaN
2       56.80          NaN
3       57.85          NaN
4       59.85          NaN
5       60.57          NaN
...       ...        ...
34      58.27        39.86
35      58.70        41.79
36      57.72        38.74
37      58.10        40.55
38      58.20        41.04

[38 rows x 2 columns]
Here we can see that our initial RSI values are NaN as expected and the ending values are calculated. At first glance, it seems this approach results in a much greater variance from Wilder’s calculations evidenced by the value of 41.04 in the final column.
The result we’ve seen in the previous two methods was slightly off as well but by less than 1% in either case. Let’s validate this data as we’ve done in previous methods to get a better idea of the variance:
        price  RSI_14 Wilder's RSI  difference  pct difference
period
14      61.37     NaN          NaN         NaN             NaN
15      62.50   68.70        74.36        5.66            7.61
16      62.57   68.94        74.55        5.61            7.53
17      60.80   57.24        65.75        8.51           12.94
18      59.37   49.88        59.68        9.80           16.42
19      60.35   54.22        61.98        7.76           12.51
20      62.35   61.55        66.44        4.89            7.36
21      62.17   60.61        65.75        5.14            7.82
22      62.55   61.93         67.0        5.07            7.56
23      64.55   68.02        71.43        3.41            4.78
24      64.37   66.98         70.5        3.52            4.99
25      65.30   69.56        72.14        2.58            3.57
26      64.42   64.43        67.95        3.52            5.19
27      62.90   56.65        60.78        4.13            6.80
28      61.60   50.98        55.56        4.58            8.25
29      62.05   52.74        56.71        3.97            7.00
30      60.05   44.99        49.49        4.50            9.09
31      59.70   43.78        48.19        4.41            9.15
32      60.90   48.87        52.38        3.51            6.71
33      60.25   46.42         50.0        3.58            7.17
34      58.27   39.86         43.5        3.64            8.36
35      58.70   41.79        45.36        3.57            7.88
36      57.72   38.74        42.53        3.79            8.90
37      58.10   40.55        44.14        3.59            8.13
38      58.20   41.04        44.75        3.71            8.28
Here we see an average variance of 8.08% from Wilder’s calculations with a minimum of 3.57% and a maximum of 16.42%. That’s considerably greater differences than our previous methods—what gives?
Under the Hood
As I mentioned before, the pandas_ta library will try to use the indicator calculations available from the TA-Lib if available on the current system. For those interested, there is a Python wrapper library for these functions available here. It requires the TA-Lib to be configured on the system to operate properly—which can be tricky to configure (see the install notes on the python wrapper link.)
Our calculations have been made using the pandas_ta fallback function which leverages the Exponentially Weighted Moving Average (EWM) function of Pandas DataFrames. This function allows for configurable use of Wilder’s alpha = 1 / period value for the smoothing function but doesn’t account for the SMA method for calculating the initial average gain/loss values.
Let’s take a look at how pandas_ta calculates the average gain/loss values and how those values are used to derive the RS value:
# pandas_ta gain/loss average calculations
positive_avg = rma(positive, length=length)
negative_avg = rma(negative, length=length)

# the underlying ram function where
# 'close' is the column from which values
# are calculated ('gain' and 'loss') using
# pandas ewn() method.
rma = close.ewm(alpha=alpha, min_periods=length).mean()
Here we see that all values for our average gains/losses are calculated using Pandas’ ewm method—skipping over the Wilder-approved SMA approach for calculating the initial values. So is this approach wrong? Not necessarily, but one needs to be mindful of the differences when implementing this approach. Now that we have an idea of the downsides of this method let’s consider some advantages.
Trading Signals
The pandas_ta library affords a lot of extra bells and whistles. First, its integration as a Pandas method is convenient enough to sell most people on the trade-0ffs discussed so far. Another strong vote for sacrificing ideology here is the automated trade signal calculations provided by pandas_ta for many of its indicators.
A very general trading strategy for the RSI is to sell when the price is above the overbought threshold and buy when it’s below the oversold threshold. By adding the signal_indicators=True argument to our RSI method we get a True/False (0/1) if the price moves outside either of these thresholds. Consider the following code:
# Calculate with signal_indicators
data.ta.rsi(close='price', length=length, append=True, signal_indicators=True)

# View result

        price     RSI_14  RSI_14_A_80  RSI_14_B_20
period
31      59.70  43.780735            0            0
32      60.90  48.866332            0            0
33      60.25  46.416984            0            0
34      58.27  39.862457            0            0
35      58.70  41.785048            0            0
36      57.72  38.744879            0            0
37      58.10  40.551068            0            0
38      58.20  41.043733            0            0
Here we see two new columns: RSI_14_A_80 & RSI_14_B_20 appended to our output data. These columns have 0 (False) values when the RSI is outside of these boundaries (above the RSI_14_A_80 and below the RSI_14_B_20 .) This isn’t very evident in the above data given our RSI value never crosses either of these lines. Let’s adjust the thresholds by adding two additional arguments to our function: xa and xb (crosses “a” and crosses “b”):
# define custom overbought/oversold thresholds
data.ta.rsi(close='price', length=length, append=True, signal_indicators=True, xa=60, xb=40)

# View Results
        price     RSI_14  RSI_14_A_60  RSI_14_B_40
period
14      61.37        NaN            0            0
15      62.50  68.701706            1            0
16      62.57  68.936534            1            0
17      60.80  57.241560            0            0
18      59.37  49.879205            0            0
19      60.35  54.224444            0            0
20      62.35  61.550568            1            0
21      62.17  60.610379            1            0
22      62.55  61.932388            1            0
23      64.55  68.016644            1            0
24      64.37  66.979072            1            0
25      65.30  69.562559            1            0
26      64.42  64.426106            1            0
27      62.90  56.645732            0            0
28      61.60  50.975691            0            0
29      62.05  52.739185            0            0
30      60.05  44.992669            0            0
31      59.70  43.780735            0            0
32      60.90  48.866332            0            0
33      60.25  46.416984            0            0
34      58.27  39.862457            0            1
35      58.70  41.785048            0            0
36      57.72  38.744879            0            1
37      58.10  40.551068            0            0
38      58.20  41.043733            0            0
Here we have set the threshold to a range of 40-60 which has produced quite a few signals in our RSI_14_A_60 and RSI_14_B_40 columns. These values can be quite useful in algorithmic trading strategies such that one needn’t crunch any additional numbers to generate trade signals.
The pandas_ta library has a number of other advantages such as being able to apply multiple indicators at once, being able to pre-define lists o indicators to apply (and customize parameters), and being optimized for multiprocessing. These aren’t RSI-specific so we’ll not touch on them here. Check out the documentation for more details on these benefits.
Visualizing the Relative Strength Index
The RSI is a useful indicator and can help inform a range of trading strategies. Combining the RSI value with a visual representation can help inform decisions faster as well as make a combination with other measures less complex.
Here we’ll look at how to visualize the RSI underneath a pricing chart using the Plotly library in Python. We will be getting new historical pricing data for $BTC-USD from the period of 2020-01-02 to 2021-07-01. This will give us many more values and make for a much more interesting visualization. We will get this data via the yfinance library for Python, but it is also available for download via Github.
import yfinance as yf

# Download historic pricing data for $BTC-USD
data = yf.Ticker('BTC-USD').history(start='2021-01-01', end='2021-07-01')[['Open', 'High', 'Low', 'Close', 'Volume']]

# Force lowercase column names
data.columns = map(str.lower, data.columns)

# View Data
print(data)

                    open          high           low         close       volume
Date
2021-01-01  28994.009766  29600.626953  28803.585938  29374.152344  40730301359
2021-01-02  29376.455078  33155.117188  29091.181641  32127.267578  67865420765
2021-01-03  32129.408203  34608.558594  32052.316406  32782.023438  78665235202
2021-01-04  32810.949219  33440.218750  28722.755859  31971.914062  81163475344
2021-01-05  31977.041016  34437.589844  30221.187500  33992.429688  67547324782
...                  ...           ...           ...           ...          ...
2021-06-27  32287.523438  34656.128906  32071.757812  34649.644531  35511640894
2021-06-28  34679.121094  35219.890625  33902.074219  34434.335938  33892523752
2021-06-29  34475.558594  36542.109375  34252.484375  35867.777344  37901460044
2021-06-30  35908.386719  36074.757812  34086.152344  35040.835938  34059036099
2021-07-01  35035.984375  35035.984375  32883.781250  33572.117188  37838957079

[182 rows x 5 columns]
Here we see 182 rows of OHLC data with volume included as well. Using the pandas RSI function we created earlier, we can generate all the required data for our visualization in a single line of code:
# Make RSI Calculations
pandas_rsi(df=data, window_length=14, price='close')

# View Data
print(data)

                    open          high  ...        rs        rsi
Date                                    ...
2021-01-01  28994.009766  29600.626953  ...       NaN        NaN
2021-01-02  29376.455078  33155.117188  ...       NaN        NaN
2021-01-03  32129.408203  34608.558594  ...       NaN        NaN
2021-01-04  32810.949219  33440.218750  ...       NaN        NaN
2021-01-05  31977.041016  34437.589844  ...       NaN        NaN
...                  ...           ...  ...       ...        ...
2021-06-27  32287.523438  34656.128906  ...  0.855455  46.104872
2021-06-28  34679.121094  35219.890625  ...  0.838944  45.620966
2021-06-29  34475.558594  36542.109375  ...  0.977327  49.426679
2021-06-30  35908.386719  36074.757812  ...  0.899955  47.367182
2021-07-01  35035.984375  35035.984375  ...  0.781602  43.870753

[182 rows x 12 columns]
Here we see the RSI value having been appended to our DataFrame object. By default, DataFrames are shown in the terminal (or various standard out streams) in a simplified manner. To see all the columns, we can use the pandas.set_option('display.max_columns', None) command. This will display all columns separated by newlines where required, such that all columns are visible. This is achieved via the following code:
# Set option to view all columns
pd.set_option('display.max_columns', None)

# View Result
print(data)

                    open          high           low         close  \
Date
2021-01-01  28994.009766  29600.626953  28803.585938  29374.152344
2021-01-02  29376.455078  33155.117188  29091.181641  32127.267578
2021-01-03  32129.408203  34608.558594  32052.316406  32782.023438
2021-01-04  32810.949219  33440.218750  28722.755859  31971.914062
2021-01-05  31977.041016  34437.589844  30221.187500  33992.429688
...                  ...           ...           ...           ...
2021-06-27  32287.523438  34656.128906  32071.757812  34649.644531
2021-06-28  34679.121094  35219.890625  33902.074219  34434.335938
2021-06-29  34475.558594  36542.109375  34252.484375  35867.777344
2021-06-30  35908.386719  36074.757812  34086.152344  35040.835938
2021-07-01  35035.984375  35035.984375  32883.781250  33572.117188

                 volume         diff     gain     loss    avg_gain  \
Date
2021-01-01  40730301359          NaN      NaN      NaN         NaN
2021-01-02  67865420765  2753.115234  2753.12     0.00         NaN
2021-01-03  78665235202   654.755859   654.76     0.00         NaN
2021-01-04  81163475344  -810.109375     0.00   810.11         NaN
2021-01-05  67547324782  2020.515625  2020.52     0.00         NaN
...                 ...          ...      ...      ...         ...
2021-06-27  35511640894  2463.367188  2463.37     0.00  719.897588
2021-06-28  33892523752  -215.308594     0.00   215.31  668.476332
2021-06-29  37901460044  1433.441406  1433.44     0.00  723.116594
2021-06-30  34059036099  -826.941406     0.00   826.94  671.465409
2021-07-01  37838957079 -1468.718750     0.00  1468.72  623.503594

              avg_loss        rs        rsi
Date
2021-01-01         NaN       NaN        NaN
2021-01-02         NaN       NaN        NaN
2021-01-03         NaN       NaN        NaN
2021-01-04         NaN       NaN        NaN
2021-01-05         NaN       NaN        NaN
...                ...       ...        ...
2021-06-27  841.537354  0.855455  46.104872
2021-06-28  796.806829  0.838944  45.620966
2021-06-29  739.892055  0.977327  49.426679
2021-06-30  746.109766  0.899955  47.367182
2021-07-01  797.724783  0.781602  43.870753

[182 rows x 12 columns]
Here we see all the intermediary steps of our RSI calculation having been added to our DataFrame. This can be useful as a debugging utility should our RSI values not appear as expected in our visualization.
Creating the RSI Chart in Plotly
Now that we have our data loaded and the RSI values calculated, we can create our visualization using the Plotly library. To achieve this goal, we will take the following steps:
- Create two subplots, one for pricing data and one for our RSI data
- Create a Candlestick chart for the pricing data
- Create a Scatterplot chart for the RSI values
- Add indicator lines for the min/max of our RSI values
- Add indicator lines for the overbought/oversold thresholds
- Customize the colors and layout of our chart
- View our chart in a web browser and save a local image file
Step 1: Create two Sublots
Plotly affords users a convenient method to create multiple charts in single visualizations. This utility is available via the make_subplots function and allows developers to specify the number of rows, columns, and even indicate when axes should be shared (i.e. our RSI values are plotted against the same date values as the prices.) Here’s the code to get our subplots configured:
# Import necessary libraries
from plotly.subplots import make_subplots
import plotly.graph_objects as go

# Create Figure
fig = make_subplots(rows=2, cols=1, shared_xaxes=True, row_width=[0.25, 0.75])

# Inspect Result
print(fig)

Figure({
    'data': [],
    'layout': {'template': '...',
               'xaxis': {'anchor': 'y', 'domain': [0.0, 1.0], 'matches': 'x2', 'showticklabels': False},
               'xaxis2': {'anchor': 'y2', 'domain': [0.0, 1.0]},
               'yaxis': {'anchor': 'x', 'domain': [0.3625, 1.0]},
               'yaxis2': {'anchor': 'x2', 'domain': [0.0, 0.2125]}}
})
Here we see a summary of our new chart’s parameters. We won’t pay much attention to this information other than to confirm we have 2-sets of axes indicating we have successfully created a row for our pricing data as well as our RSI data.
Step 2: Create a Candlestick Chart for Price Data
The RSI is commonly displayed as an accompanying chart shown below pricing data. This allows traders to visualize how the market action indicated by the RSI has influenced the price action over time. To accomplish this, we first need to set up a chart for our pricing data. We will create a Candlestick chart using our OHLC data and the following code:
# Create Candlestick chart for price data
fig.add_trace(go.Candlestick(
    x=data.index,
    open=data['open'],
    high=data['high'],
    low=data['low'],
    close=data['close'],
    increasing_line_color='#ff9900',
    decreasing_line_color='black',
    showlegend=False
), rows=1, cols=1)
Step 3: Create a Scatterplot chart for the RSI
The next step is to create a chart for our RSI value. This will be a simple Scatter plot (data points connected by a line) that represent the RSI values over the dates shown in our data. Here we will specify the chart to be at the bottom of our visualization by using the rows=2 argument:
# Make RSI Plot
fig.add_trace(go.Scatter(
    x=data.index,
    y=data['rsi'],
    line=dict(color='#ff9900', width=2),
    showlegend=False,
), row=2, col=1
)
Step 4: Add Min/Max Lines for the RSI
The RSI is a standardized value between 0-100. It is useful to have this range reflected on the RSI visualization to ensure it appears as common RSI charts are expected. This ensures that we are able to view a consistently scaled RSI even when inspecting different data. This is accomplished by adding two horizontal lines as seen in the following code:
# Add upper/lower bounds
fig.update_yaxes(range=[-10, 110], row=2, col=1)
fig.add_hline(y=0, col=1, row=2, line_color="#666", line_width=2)
fig.add_hline(y=100, col=1, row=2, line_color="#666", line_width=2)
Step 5: Add Overbought/Oversold Threshold Lines
The RSI oscillates between the overbought and oversold thresholds, which we defined in our initial calculations. In this case, we’re using a value of 70 for the overbought line and 30 for the oversold. We’ll add two horizontal lines via the Scatter method of Plotly to visualize these. We’ll also customize these lines slightly and make them dashed, a different (lighter) color, and give them a bit of extra thickness. This is done in the following code:
# Add overbought/oversold
fig.add_hline(y=30, col=1, row=2, line_color='#336699', line_width=2, line_dash='dash')
fig.add_hline(y=70, col=1, row=2, line_color='#336699', line_width=2, line_dash='dash')
Step 6: Customize & Visualize
At this point, our chart is fully developed and should reflect our data accordingly—meaning it’s time to create the visualization! Plotly offers several methods for displaying charts including the creation of interactive HTML charts, exporting to static images like .png or .jpg, or uploading directly to their enterprise Dash platform for a hosted solution. We will use the show() method to launch our visualization in the system’s default HTML viewer (e.g. Chrome, Firefox, Opera, etc.) with the following code:
# Customize font, colors, hide range slider
layout = go.Layout(
    plot_bgcolor='#efefef',
    # Font Families
    font_family='Monospace',
    font_color='#000000',
    font_size=20,
    xaxis=dict(
        rangeslider=dict(
            visible=False
        )
    )
)

# update and display
fig.update_layout(layout)
fig.show()
After executing our code, the following visualization should launch in the system’s default HTML viewer. Here we see our Candlestick figure on top at the specified height percentage of .75 and the RSI subplot beneath taking up the remainder of the allocated figure space:

This visualization provides us with ample information related to price and the fluctuation of the RSI value over our time period. One of the many benefits of Plotly’s HTML functions is the mouse-over effects that detail period-wise information. On the Candlestick chart, this is evidenced by OHLC info and the RSI chart shows our date and RSI value. This can be seen in the series of screenshots below:

The previous image shows the mouse-over effects and resulting data offered by the dynamic HTML system of Plotly. These features, while not always necessary, provide a great deal of additional support when studying and learning chart behaviors in Python.
Review
We’ve covered a lot of ground here and so let’s take a moment to recall what we’ve discussed:
- The Relative Strength Index (RSI) was invented by Welles Wilder and presented to the world in 1978 as a means to get around the downside of common oscillators used at the time.
- The RSI involves several steps that account for differences in price relative to highs and lows during a previous trading period—commonly 14 days.
- The RSI results in a value between 0-100 where any values above a given threshold (commonly 70) indicate an overbought market (time to sell!) and values below a given threshold (commonly 30) indicate an oversold market (time to buy!)
- Calculating the RSI involves several intermediate steps to get the difference in price, the average gains and losses, and a way to smooth the results.
- Welles Wilder’s approach calculates the first values for average gains/losses using a Simple Moving Average (SMA) for the first value, and an Exponentially Weighted Moving Average (EMA) with an alpha value of
(1 - period length). - Some modern approaches use an alpha value of
2 / period + 1 - The RSI can be calculated in Python either by manual implementation, a mixture of manual implementation with the help of Pandas, or by using the pandas_ta library.
Final Thoughts
The Relative Strength Index (RSI) has been among the most popular technical indicators since its introduction by Wilder in 1978. Modern implementations vary from trader to trader and often tweak the values of the overbought and oversold thresholds, the lookback period, and the alpha value for the smoothing function. There is no “right” approach to implementing the RSI—though there is an argument to be made for an approach being “right” in accord with Wildern’s original presentation.
We’ve seen three implementations here, each with pros and cons. The vanilla Python implementation allows for the greatest control but is the most syntactically cumbersome. The Pandas approach is fairly concise but still involves some involved syntactic juggling. The pandas_ta method is—by far—the simplest but also results in the highest variance when compared to results calculated by Wilder’s original methods. Which one is the best? That’s a decision to be made by each trader with their own applications in mind!
References
- Boboc, Ioana-Andreea, and Mihai-Cristian Dinică. “An algorithm for testing the efficient market hypothesis.” PloS one vol. 8,10 e78177. 29 Oct. 2013, doi:10.1371/journal.pone.0078177
- Tharavanij, Piyapas et al. “Performance of technical trading rules: evidence from Southeast Asian stock markets.” SpringerPlus vol. 4 552. 25 Sep. 2015, doi:10.1186/s40064-015-1334-7
- Wilder, Welles. New Concepts in Technical Trading Systems. Trend Research, 1978.